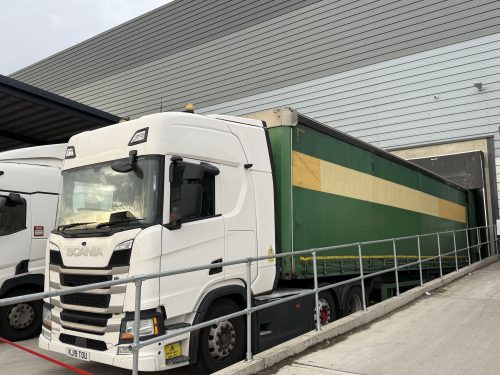
For manufacturers and e-commerce sellers, an improperly loaded shipping container is a direct hit to profitability. It's not just about cargo damage; it's a cascade of costly failures, including customs holds, container rejection at the port, freight drayage complications, and significant safety liabilities.
A successful load-out is a function of process and precision. Failing to create a detailed load plan is the most common and expensive error. This guide outlines the critical technical considerations for your first container load.
1. Pre-Planning: The Load Plan, Weight, and Documentation
Before the truck arrives, your shipment's success is determined by your planning.
- Create a Container Load Plan (CLP): Do not attempt to "wing it." A CLP, generated with software or careful calculation, is your blueprint. It verifies your cargo volume fits the container type (e.g., 20'GP, 40'GP, 40'HC) and maps the exact placement of each pallet or crate.
- Verify Weight Distribution & Axle Limits: This is a non-negotiable legal and safety requirement. Your load plan must confirm you are not exceeding the container's maximum payload. More importantly, it must distribute the weight to comply with legal axle weight limits for the truck chassis (drayage). A container that is too heavy at the nose or tail can result in severe fines and a forced reload.
- Calculate Verified Gross Mass (VGM): Under SOLAS (Safety of Life at Sea) regulations, the port will not load your container onto a ship without a declared VGM (the total weight of the cargo plus the container's tare weight). Have this calculation ready before pickup.
- Classify Your Cargo: Are you shipping hazardous materials (Hazmat)? This requires specific declarations, labeling (placards), and segregation within the container. Are items fragile or sensitive to moisture? This dictates the type of dunnage and desiccant you'll need.
Pre-Loading: The 7-Point Seaworthiness Inspection
When the empty container arrives, you must conduct a 7-point inspection before a single item goes inside. If you load a compromised container, you may become liable for any resulting cargo damage.
- Exterior Undercarriage & Corner Posts: Check that the support beams are not bent and that the corner posts are structurally sound.
- Doors & Seals: Open and close both doors. Ensure the locking bars and handles function, and critically, that the rubber seals are intact and pliable to prevent water intrusion.
- Interior Walls & Ceiling: Look for patches, holes, or significant dents that could compromise structural integrity or allow water ingress.
- Floor Integrity: Walk the entire floor. Check for delamination or soft spots that a forklift could puncture. The floor must be clean, dry, and free of protruding nails or screws from previous loads.
- The "Light Test": Step inside the container, close both doors, and let your eyes adjust. If you see any pinpricks of light, the container is not watertight. Reject it.
- Lashing Points: Verify that the D-rings (lashing points) on the floor and ceiling rails are present, in good condition, and solidly welded.
- Odors & Contamination: The container must be free of strong odors, chemical residues, or signs of pests, which could transfer to your product.
If the container fails any of these checks, contact the freight line immediately and request a new unit.
3. The Loading Process: Securing & Distribution
This is where your load plan is executed. The core principles are weight balance and cargo immobility.
Weight Distribution
- The 60/40 Rule: Never concentrate more than 60% of the cargo weight in one half of the container's length.
- Center of Gravity (CoG): The CoG should be as low and as close to the container's center as possible. Load your heaviest items on the floor and in the middle. Distribute weight evenly from side to side. An unbalanced load can cause a truck to tip or a container to be rejected at the terminal.
Cargo Securing (Blocking, Bracing & Lashing)
Cargo will shift due to vibration and movement (longitudinal, lateral, and vertical) at sea. Your job is to prevent it.
- Pack "High and Tight": This is the industry standard. Your goal is to minimize all empty space (voids). Cargo should be packed tightly against the walls and, if stackable, to the ceiling.
- Blocking & Bracing: This involves using lumber (dunnage) to build a framework that locks the cargo in place. This is essential for preventing longitudinal shifting (front-to-back) and is non-negotiable for heavy, non-palletized items like machinery.
- Void Filling: Never leave significant gaps. Use inflatable dunnage airbags in the spaces between pallets to create a tight load. For smaller voids, use corrugated cardboard or other fillers.
- Lashing: Use the container's D-rings to secure cargo. For heavy equipment, high-tensile polyester lashing is often safer, stronger, and more efficient than traditional steel banding or chains. Ratchet straps are suitable for securing lighter palletized goods.
4. Final Steps: Sealing and Documentation
- Create a Photographic Record for Liability: Before closing the doors, take multiple photographs:
- A shot of the empty, inspected container.
- Photos of the cargo at the halfway loading point.
- A final photo showing the fully loaded container and your securing measures (bracing, airbags, straps).
- A close-up of the cargo at the doors. This is your primary evidence in the event of an insurance claim, proving the cargo was "properly blocked and braced" before transit.
- Affix a High-Security Bolt Seal: Do not use a cheap plastic or cable seal. You must use an ISO 17712-compliant high-security bolt seal. Once you (or the driver) affixes the seal, record the unique seal number on the Bill of Lading (BOL). This seal is critical for C-TPAT (Customs-Trade Partnership Against Terrorism) compliance and ensures the chain of custody.
Proper container loading is a function of process and risk management. For a manufacturer or e-commerce seller, mastering this process is a direct investment in protecting your product, your reputation, and your bottom line.
Contact us today to begin your shipping journey.


